
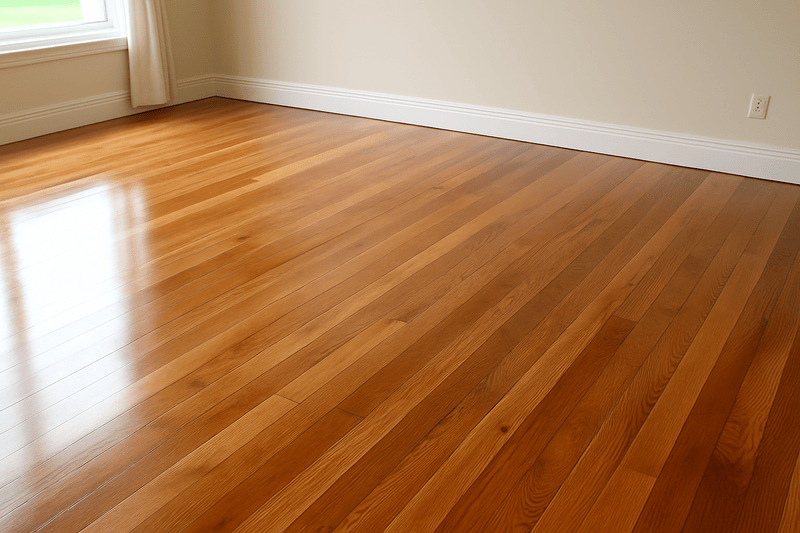
Timber floors are one of the most beloved features of homes across Sydney’s Eastern Suburbs. Whether you’re walking across polished blackbutt in Bronte or maintaining an aged oak floor in Paddington, wooden flooring delivers timeless charm and character. But like all materials, it’s subject to wear and tear over time. That’s where floor sanding in the Eastern Suburbs plays an essential role in keeping these surfaces both beautiful and functional.
From dealing with deep scratches and fading finishes to restoring heritage charm, professional floor sanding brings old floors back to life. If you’re preparing a property for sale or simply want to refresh your space, understanding the process, benefits, and long-term value of sanding can help you make a confident decision.
In this guide, we’ll explore how the process works, signs your floors need attention, and why working with seasoned experts like Glen Gilbertson Floorsanding is a smart move for homeowners throughout the east.
Why Floor Sanding Matters in the Eastern Suburbs
Homes in Sydney’s east are subject to some unique challenges: coastal conditions, sandy foot traffic, and a blend of contemporary and heritage housing styles. Timber flooring—while durable—can lose its lustre due to high traffic, sun exposure, moisture, or ageing finishes.
That’s why floor sanding is so effective. It:
- Smooths rough or splintered areas
- Eliminates scratches, dents, and stains
- Removes old coatings and discoloration
- Prepares the floor for new stains or protective finishes
Whether you’re in Randwick, Coogee, or Rose Bay, giving your timber floors a professional sand can improve both their appearance and performance—often extending their life by a decade or more.
As discussed in this Blogrip article on home asset preservation, maintaining your original materials is often more sustainable and cost-effective than installing new products.
What’s Involved in Floor Sanding?
Floor sanding isn’t just a surface clean—it’s a multi-stage process that requires experience, precision, and specialised equipment. Here’s how it typically works:
1. Inspection & Preparation
Before sanding begins, the team inspects for loose boards, exposed nails, or damage. Furniture is removed, and floor gaps are filled if necessary.
2. Coarse Sanding
A heavy-grit belt sander strips away old finishes and levels out uneven boards. This is where major imperfections are removed.
3. Medium & Fine Sanding
Finer abrasives are used to smooth the surface, preparing it for coating. Edges and corners are tackled with detail tools to ensure uniformity.
4. Optional Staining
If you want to change the tone of your timber—lightening, darkening, or harmonising it with your interiors—this is the stage to apply stains.
5. Sealing & Coating
Clear sealers are applied to protect the timber from moisture, UV rays, and wear. Common finishes include water-based polyurethane, oil-modified sealers, and natural oil coatings.
Each step demands attention to detail. That’s why many locals rely on Glen Gilbertson Floorsanding, whose reputation for thorough prep and impeccable finishes spans across Sydney’s eastern coast.
Signs Your Floors Need Sanding
Not sure if your timber floors need a sand and seal, or just a clean and polish? Here are some key signs it’s time for a refresh:
- Surface dullness despite regular cleaning
- Fine scratches or scuff marks in visible areas
- Grey or patchy areas where sealant has worn away
- Discolouration from rugs or sun exposure
- Uneven texture or splintering
In many homes, especially those with original flooring, you may not realise how worn the surface is until it’s sanded. The transformation can be dramatic.
Benefits of Professional Floor Sanding
Choosing to sand your timber floors isn’t just about looks—it’s also about performance and safety. Here are the top benefits:
- Longer floor lifespan
Sanding and resealing protects timber from water ingress, pests, and rot. - Improved indoor air quality
A sealed surface reduces dust build-up and allergen accumulation. - Increased property value
Buyers often prefer timber floors and are willing to pay more for homes where floors are in top condition. - Custom aesthetic
With staining options, you can modernise your space without replacing the floorboards.
For property investors or those preparing to sell, this Blogrip piece on pre-sale renovations highlights how restored flooring can impact sale results.
Choosing the Right Finish: What Suits Your Space?
After sanding, the final step is to seal and finish your floor. Your choice of finish affects both appearance and maintenance.
- Gloss: Shiny and elegant, best suited for formal areas but can highlight imperfections.
- Satin: A balanced, soft sheen that works in most homes.
- Matte: Popular for its natural, understated look and ability to hide dust and minor marks.
- Oil-based: Enhances timber grain, but takes longer to dry and may require more maintenance.
- Water-based: Fast-drying, low odour, and environmentally friendly.
An expert team like Glen Gilbertson Floorsanding can guide you through the finish options to match your flooring material and interior style.
Floor Sanding FAQs
How long does floor sanding take?
A typical home can be completed in 2–4 days, depending on the size, condition, and whether staining is included.
Do I need to move out during the process?
You’ll need to avoid walking on the floors while coatings cure, especially with solvent-based finishes. Many homeowners choose to stay elsewhere during sanding.
Can all timber floors be sanded?
Most solid hardwoods can be sanded multiple times. Engineered floors with thick top layers may also be eligible, but laminate and vinyl cannot.
How often should floors be re-sanded?
With proper care, floors may not need sanding again for 10–15 years. Routine cleaning and occasional recoating can extend this timeline.
Leave a Reply